Here’s a step-by-step guide on how to set up CurseForge and get yourself prepped for the Beardcraft SMP server.
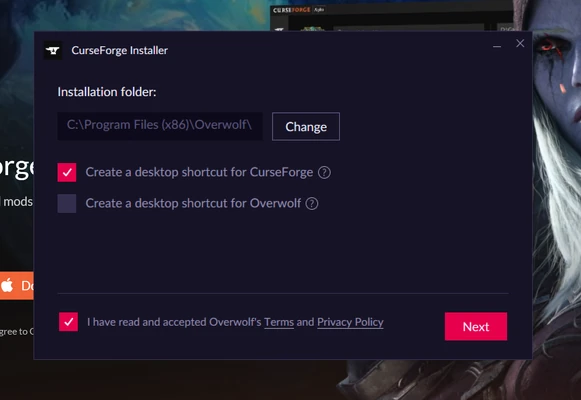
The launcher to use when wanting to play on the server is CurseForge! Click this link to download it.
https://static.wikia.nocookie.net/bzgc-mc-server/images/8/85/Curse.png/revision/latest/scale-to-width-down/581?cb=20210319154721
No login is required but it might be beneficial to create a CurseForge account if you don’t already have one. Once it’s downloaded, launch CurseForge!
Upon first opening, you’ll need to choose Minecraft as a game and where you’d like the files to be saved.
Click "Browse Modpacks" and search for Beardcraft SMP. It should pop up and all you need to do is hit install! It will begin installing and once that's complete then you're all set!
https://static.wikia.nocookie.net/bzgc-mc-server/images/5/53/Browse_Curseforge.png/revision/latest/scale-to-width-down/393?cb=20210407172354
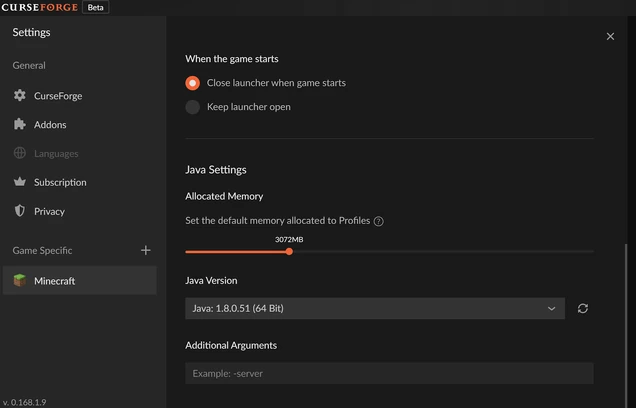
Before you begin your adventures, make sure to allocate enough RAM so that things run smoothly! By default CurseForge has it set to allocate 4GB of RAM towards Minecraft. For a smooth experience on the server, we recommend increasing to at least 6GB.
Follow the below instructions to do so:
https://static.wikia.nocookie.net/bzgc-mc-server/images/3/3c/Allocating_ram.png/revision/latest/scale-to-width-down/636?cb=20210319155556
Choose a setting that fits your computer’s RAM: